
Side Dishes
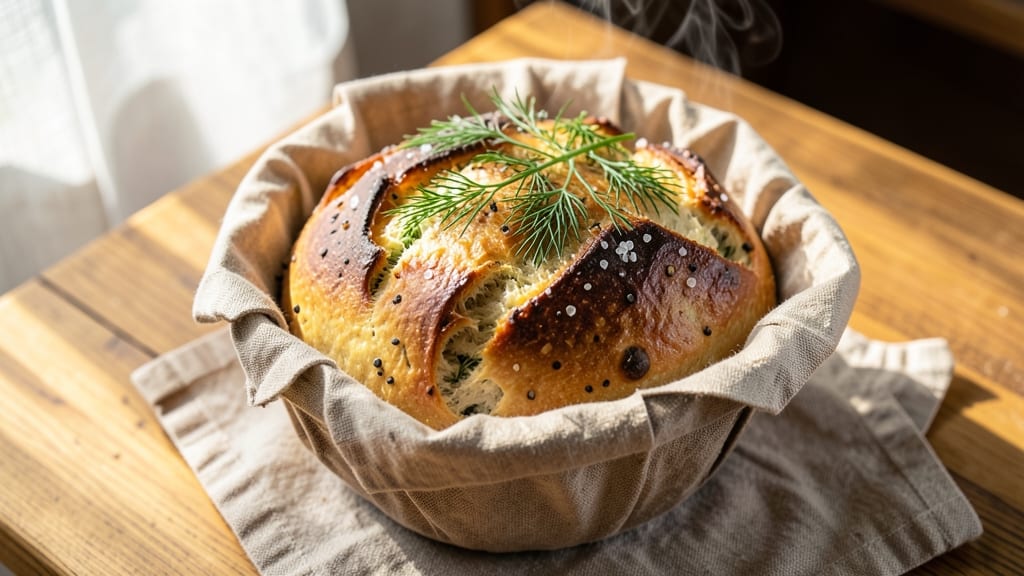
This artisan dill bread recipe delivers the perfect balance of herby crust and pillowy softness inside—ideal for elevating any meal. The secret lies in a precise dough formula with fresh dill and optional herbs, combined with traditional kneading and proofing techniques.
What sets this apart is the aromatic dill infusion throughout the dough, creating a fragrant crust that pairs beautifully with soups, salads, or simply as a side.
The process begins with a simple yet effective dough made from flour, yeast, water, salt, and fresh dill, which infuses the bread with a bright, herby flavor. Kneading develops the gluten for structure, while proofing allows the dough to rise to its full potential.
Shaping and scoring ensure a crispy crust and even baking, resulting in a loaf that’s both visually appealing and delicious. This method is beginner-friendly but delivers restaurant-quality results.
Baking at the right temperature—375°F—creates a golden crust with a tender crumb inside, while resting the bread after baking ensures optimal texture. The addition of optional seeds or whole grains can customize the loaf to your preference, but the core technique remains the same.
Whether you're serving it fresh from the oven or toasted the next morning, this bread will become a staple in your kitchen.
Perfect for sandwiches, charcuterie boards, or as a side dish, this artisan dill bread is versatile and impressive. The herby notes from the dill add depth, making it stand out from traditional bread recipes. Let’s get started on creating your own loaf of this fragrant, flavorful bread.
Ingredients for artisan dill bread
Fresh dill, warm yeast, and simple pantry staples transform into fragrant bread with crispy crust and soft center.
| Ingredient | Amount | Notes |
|---|---|---|
| All-Purpose Flour 🌾 | 4 cups | Spooning and leveling for accuracy |
| Active Dry Yeast 🍞 | ¼ tsp | Ensure it's fresh (test in warm water) |
| Fresh Dill Weeds 🌿 | ½ cup | Finely chopped, stems removed |
| Granulated Sugar 🍚 | 1 tbsp | Helps activate yeast |
| Salt 🧂 | 1 tsp | Diamond Crystal preferred |
| Warm Water 💧 | 1 ¼ cups | 110°F for optimal yeast activation |
| Extra-Virgin Olive Oil 🫒 | ¼ cup | For dough and brushing |
| Poppy Seeds 🌻 | 1 tbsp | Optional for extra texture |
| Sesame Seeds 🌰 | 1 tbsp | Optional for nutty flavor |
| Cornmeal 🌽 | ¼ cup | For dusting baking sheet |
| Egg Wash 🥚 | 1 whole | Beaten with 1 tbsp water |
| Coarse Sea Salt 🧂 | ½ tsp | For sprinkling before baking |
The dill is everything here—farmers market bunches have the most flavor, but grocery store dill works too (just chop extra fine). King Arthur or Bob's Red Mill flour gives the best texture, but any all-purpose works in a pinch. Yeast can be tricky: if it's old, proof it in warm water first—it should foam within 5 minutes. For the water, 110°F is ideal—too hot kills yeast, too cold slows it down. I always grab extra dill because half goes in the dough and half gets sprinkled on top for that restaurant-quality aroma.
No fresh dill? 1 tbsp dried dill at half the amount works, but it won't have the same bright flavor. Swap poppy seeds for sesame or flaxseeds if you prefer. The olive oil matters—California avocado oil works too, but avoid cheap vegetable oil. For the egg wash, if you're avoiding eggs, 1 tbsp olive oil + 1 tbsp water does the trick. The cornmeal is just to prevent sticking—semolina works too. And if you're feeling fancy, add a pinch of fennel seeds to the dough for extra depth.
This dough needs 2 hours of rising time—don't rush it. Shape it gently to avoid over-developing the gluten. For storage, wrap the cooled loaf in a clean kitchen towel and keep at room temp for 2-3 days. Freeze slices for up to 3 months—toast straight from frozen. The best part? It reheats beautifully—just pop slices in a 350°F oven for 5 minutes to revive that fresh-baked taste.
Why You'll Love This Recipe
- No-Knead Magic: I swear by this dough—just mix, wait, and bake. The yeast does all the work while you sip coffee or scroll through your phone. Honestly, it’s the kind of recipe that makes me feel like a lazy genius.
- Herb Bomb Flavor: That fresh dill? It’s not just in the bread—it’s the star. The bright, grassy notes cut through the soft, chewy crumb like a cool breeze on a summer day. (Between us, I’ve been known to eat slices straight from the pan.)
- Weeknight Swiss Army Knife: This bread saves my dinner game—toss it with olive oil for a quick bruschetta, pair it with soups, or freeze half for lazy mornings. I keep a loaf in the fridge just for those nights when I can’t decide what to eat.
- Budget-Friendly Staple: Five ingredients, zero guilt. A single batch feeds my family for days, and the leftovers? Perfect for toast, sandwiches, or even crumbs to thicken soups. My wallet and my taste buds high-five every time.
Step-by-step instructions for artisan dill bread
Here's how to make bread that's crisp on the outside and impossibly soft inside.
Activate the Yeast and Mix the Dough
In a small bowl, combine the 1.25 cups warm water (about 110°F) with the 1 tbsp granulated sugar and 0.25 tsp active dry yeast. Let it sit for 5-10 minutes until it becomes frothy—this means your yeast is alive and ready to work. If it doesn't bubble, your yeast might be old, and you'll need to start over.
In a large mixing bowl, whisk together the 4 cups all-purpose flour, 1 tsp salt, and 0.5 cup finely chopped fresh dill weeds. Make a well in the center and pour in the yeast mixture and 0.25 cup extra-virgin olive oil. Use a wooden spoon to mix until a shaggy dough forms, then turn it out onto a lightly floured surface and knead for 8-10 minutes until smooth and elastic. The dough should spring back when poked—this is your sign it's ready.
Let the Dough Rise Until Doubled
Lightly grease a large bowl with olive oil, place the dough inside, and cover it with a damp kitchen towel. Let it rise in a warm spot for 1-2 hours or until it has doubled in size. You'll know it's ready when the dough feels light and airy—press your finger gently into it, and it should leave a slow, springy indentation.
While the dough rises, preheat your oven to 375°F and line a baking sheet with parchment paper. Sprinkle the 0.25 cup cornmeal evenly over the parchment—this will prevent sticking and add a nice texture to the bottom of your bread.
Shape, Proof, and Score the Dough
Punch down the risen dough to release any air bubbles, then turn it out onto a lightly floured surface. Gently shape it into a 9x5-inch loaf by folding the edges toward the center and rolling it tightly. Place the shaped loaf seam-side down on the prepared baking sheet, cover it again with the damp towel, and let it rise for another 30-45 minutes until it puffs up noticeably.
Once proofed, use a sharp knife or a lame to score the top of the loaf in a simple crisscross pattern. This step isn't just for looks—it helps the bread expand properly in the oven and prevents it from bursting open in unexpected places. Sprinkle the 0.5 tsp coarse sea salt evenly over the scored surface for extra flavor.
Bake to Golden Perfection
Bake the loaf in the preheated oven for 35-40 minutes until it's deep golden brown and sounds hollow when tapped on the bottom. The internal temperature should reach 190-200°F—this ensures it's fully baked without drying out.
For that signature herby crust, brush the warm bread with the 1 whole egg wash (beaten with 1 tbsp water) and sprinkle the 1 tbsp poppy seeds and 1 tbsp sesame seeds on top while it's still hot. The seeds will toast beautifully and add a delightful crunch. Let the bread cool on a wire rack for at least 15 minutes before slicing—this gives the crumb time to set and prevents a gummy texture.
Pro Tips For Making Artisan Dill Bread
- Bloom the Yeast First: Skip mixing yeast directly into flour—it’s lazy and unreliable. Instead, dissolve it in warm water (110°F) with a pinch of sugar, then wait 5-10 minutes until it’s frothy and bubbly. This guarantees your bread rises properly, not just maybe rises.
- Chop Dill Like Herbs: Treat fresh dill like you would basil or cilantro—roughly chop it, not finely mince. Whole stems add texture, but big chunks make the flavor pop without turning the dough into dill soup. (And yes, I’ve done that.)
- Don’t Over-Knead the Dill: Dill is delicate, and overworking the dough will bruise it into oblivion. Stop kneading once the dough pulls cleanly away from the bowl—about 5-7 minutes by hand. Overdo it, and your bread tastes like dill-flavored wallpaper paste.
- Score Before Baking: Slash the dough with a sharp knife or razor before it goes in the oven—no waiting. A deep, confident cut (about ½-inch) steers the rise and prevents a sad, collapsed dome. (I learned this after watching my first loaf balloon like a sad balloon animal.)
Pro cooking tips for perfect results
Yeast Activation Test
Before mixing your dough, always test your yeast in warm water with sugar. The yeast should create a frothy foam within 5-10 minutes—if it doesn't, your yeast is likely dead. I keep a small jar of yeast in my freezer as a backup for those "just in case" moments.
For extra insurance, use King Arthur bread yeast, which is known for its reliability. 🔥
Kneading Like a Pro
Knead your dough for 8-10 minutes until it's smooth and elastic. If it feels sticky, add flour 1 tablespoon at a time—over-kneading can make the bread tough. I use a stand mixer with a dough hook on low speed for 5-6 minutes to save my arms.
The dough should pass the "windowpane test": stretch a small piece thin enough to see light through it.
Proofing Temperature Matters
Proof your dough in a warm spot—75-80°F is ideal. If your kitchen is cold, place the bowl near the oven with the light on or use a proofing box (a simple DIY version is a bowl of hot water in a trash bag with a towel draped over it).
Cold dough rises slower, which can lead to uneven baking. I often proof mine in my oven with the light on for consistent results. ⏰
Scoring for Success
Use a sharp razor blade or lamé to score your bread before baking. A simple crisscross pattern works best for this loaf. Press down 1/8 inch into the dough—this helps steam escape and creates that beautiful crust.
If your knife isn't sharp, the dough will smear instead of cut cleanly. I keep a dedicated scoring tool in my kitchen for this exact purpose. 💡
Steam for Crispy Crust
For an extra crispy crust, place a metal pan on the oven rack below your bread and add 1 cup boiling water when you put the loaf in. The steam creates a perfect oven spring.
Alternatively, spray the oven walls with water before baking. This trick works especially well for artisan breads like this dill version. 🌟
Resting Before Slicing
Never slice your bread immediately after baking—wait at least 15 minutes (up to 1 hour for best results). This allows the crumb to set and prevents a gummy texture. I like to wrap my cooled loaf in a clean kitchen towel to keep it soft.
If you're short on time, a 350°F oven for 5 minutes will revive stale slices beautifully. ✨
Nutrition facts
Frequently asked questions
Can I substitute dried dill for fresh in this recipe?
Yes, but use only 1 tablespoon dried dill for every 0.5 cup fresh dill in the recipe. Dried dill is more concentrated, so too much will make your bread taste bitter. For best results, finely chop the dried dill and mix it directly into the flour before combining with other ingredients.
Why does my artisan dill bread turn out dense instead of light and airy?
Dense bread usually means the yeast didn't activate properly or the dough didn't rise enough. Always test your yeast first in warm water with sugar—it should foam within 5-10 minutes. Also, ensure your proofing environment is warm (75-80°F) and give the dough plenty of time to double in size. Over-kneading can also make bread tough, so aim for 8-10 minutes of kneading.
How can I make this bread without an egg wash?
Mix 1 tablespoon olive oil with 1 tablespoon water as a substitute for the egg wash. Brush this mixture on the baked loaf before sprinkling seeds. It won't give the same golden sheen, but it will still add moisture and help the seeds stick. For extra shine, add 0.5 teaspoon honey to the mixture.
Can I add other herbs to this dill bread? Try adding 1 tablespoon chopped parsley or 1 teaspoon dried thyme to the dough for extra flavor. For a Mediterranean twist, mix in 1 tablespoon chopped oregano along with the dill. Just
How long can I keep this bread fresh?
Wrap the cooled loaf in a clean kitchen towel and store it at room temperature for 2-3 days. For longer storage, slice the bread and freeze the slices in a sealed bag for up to 3 months. To revive stale slices, warm them in a 350°F oven for 5 minutes or toast in a toaster until golden and crisp.