
Side Dishes
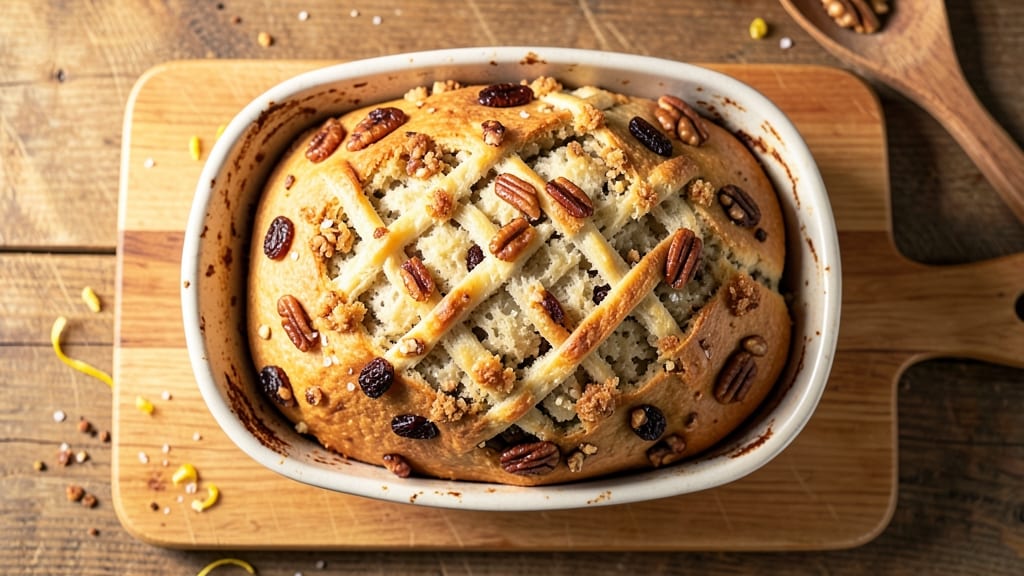
This artisan raisin walnut bread recipe delivers the perfect balance of chewy texture and crispy crust, with sweet raisins and nutty walnuts swirled throughout. The secret lies in proper yeast activation and gentle kneading—techniques that develop gluten without overworking the dough, ensuring a tender crumb.
I've perfected this recipe over years of baking, and it never fails to impress with its aromatic warmth and satisfying bite.
What makes this bread truly special is the layered flavor experience: the natural sweetness of plump raisins contrasts beautifully with the earthy crunch of walnuts, while a touch of cinnamon adds depth.
The dough proofing at room temperature creates that signature open crumb structure, and baking at high heat develops a golden, crackly crust that's irresistible. This isn't just bread—it's a textural and flavor adventure in every slice.
Once baked, the bread yields perfectly toasted slices with a crisp exterior and soft, moist interior, ideal for breakfast toast or elegant sandwiches. The walnuts maintain their satisfying crunch even after baking, while the raisins release their sweetness in each bite.
For added richness, brush the warm bread with melted butter—this simple step elevates the flavor to restaurant-quality levels.
This recipe works beautifully for holiday gatherings, breakfast tables, or as a thoughtful homemade gift. The dough can be prepared ahead and proofed overnight for convenience, making it perfect for busy schedules.
Whether you're serving it warm from the oven or enjoying it toasted the next morning, this artisan raisin walnut bread is sure to become a family favorite.
Ingredients for artisan raisin walnut bread
Twelve simple ingredients crafting a bread with perfect chewy texture and crispy crust.
| Ingredient | Amount | Notes |
|---|---|---|
| Active Dry Yeast 🍞 | 2 ¼ tsp | One packet ensures proper activation |
| Warm Water 💧 | 1 ¼ cups | 110°F for optimal yeast activation |
| All-Purpose Flour 🌾 | 6 cups | King Arthur or similar preferred |
| Granulated Sugar 🍚 | ¼ cup | For yeast activation and flavor |
| Unsalted Butter 🧈 | ½ cup | Cold, cubed for proper mixing |
| Large Eggs 🥚 | 2 whole | Room temperature for even mixing |
| Whole Milk 🥛 | ½ cup | Warmed to enhance dough tenderness |
| Sea Salt 🧂 | 1 ½ tsp | Diamond Crystal preferred |
| Ground Cinnamon 🌿 | 1 tsp | For subtle aromatic depth |
| Plump Raisins 🍇 | 1 ½ cups | Soaked in warm water first |
| Chopped Walnuts 🥜 | 1 ½ cups | Toasted for enhanced flavor |
| Cornmeal 🌽 | ¼ cup | For dusting baking sheet |
| Melted Butter 🧈 | ⅛ cup | For brushing warm bread |
The yeast is your foundation—King Arthur or similar high-quality flour ensures proper gluten development. I always use Diamond Crystal sea salt for its consistent grain size, which prevents over-salting. For the raisins and walnuts, soak them in warm water for 15 minutes before mixing—they'll plump up and release more flavor. The butter should be cold when you start, but room temperature by the end of mixing for that perfect tender crumb. If your kitchen runs warm, chill the dough for 20 minutes before shaping.
No raisins? Dried cranberries or chopped dates work beautifully—just adjust the sweetness with an extra teaspoon of sugar. Walnuts too pricey? Pecans or almonds give a similar texture, though the flavor shifts slightly. The cinnamon is optional but recommended—it adds that subtle warmth that makes this bread truly special. For a gluten-free version, substitute the flour with a 1:1 gluten-free baking flour blend, though texture may vary. And if you're short on time, instant yeast—just mix it directly with the dry ingredients.
This dough can be prepared up to 24 hours ahead—just cover and refrigerate until ready to shape. The proofing stage is critical: room temperature for 1.5-2 hours until doubled in size. For a richer flavor, brush the warm bread with melted butter while it's still in the pan. Store wrapped at room temperature for 2 days or freeze for up to 3 months. Toasting slices revives their crispy crust, making them perfect for breakfast or elegant sandwiches.
Why You'll Love This Recipe
- No-Knead Magic: I swear by this—just mix the warm water, yeast, and a pinch of sugar, let it foam, then fold in the flour, butter, and those plump raisins and chopped walnuts. The dough barely needs handling, and the slow rise? That’s what gives it that airy, golden crust I can’t resist.
- Sweet-Savory Crunch: That first bite—warm, buttery bread with chewy raisins and crunchy walnuts? It’s like a hug for your taste buds. The butter keeps it rich without being heavy, and the walnuts add a nutty punch that balances the sweetness perfectly.
- Breakfast to Brunch: This bread isn’t just for toast—slice it thick for French toast with cinnamon, toast it for a quick breakfast, or even use it as a base for a savory panini. Honestly, I’ve had it with jam, cheese, and even scrambled eggs, and it never lets me down.
- Budget Baking Wins: A loaf costs pennies to make, but it feels like a bakery treat. The butter and walnuts are the splurges, but they stretch across days—perfect for sandwiches, snacks, or gifting. Plus, the dough keeps well, so I can bake one batch and enjoy it for a week.
Step-by-step instructions for artisan raisin walnut bread
Here's how to craft bread with a perfect balance of sweet, nutty swirls and crispy crust—every slice delivers.
Activate the Yeast and Prepare the Dough Base
In a small bowl, combine the 2.25 tsp active dry yeast with 1.25 cups warm water (110°F) and 0.25 cup granulated sugar. Let it sit for 5-10 minutes until frothy—this confirms the yeast is active. If it doesn't bubble, start over with fresh yeast.
In a large mixing bowl, whisk together 6 cups all-purpose flour, 1.5 tsp sea salt, and 1 tsp ground cinnamon. Cut in the 0.5 cup cold unsalted butter using a pastry cutter or your fingers until the mixture resembles coarse crumbs. This creates the perfect texture for the dough.
Mix and Knead the Dough to Develop Gluten
Make a well in the center of the dry ingredients and add the yeast mixture, 2 whole large eggs, and 0.5 cup warm whole milk. Mix with a wooden spoon until combined, then transfer to a stand mixer fitted with the dough hook. Knead on medium speed for 5-7 minutes until the dough is smooth and elastic, pulling away from the sides of the bowl.
If the dough feels too sticky, add 1-2 tablespoons flour at a time until it comes together. The dough should be soft but not wet—this ensures proper rise and texture. Real talk: Over-kneading develops too much gluten, making the bread dense, so stop when it's just past the sticky stage.
Incorporate Raisins and Walnuts for Texture and Flavor
Remove the dough from the mixer and transfer it to a lightly floured surface. Gently press down on the dough to flatten it slightly, then sprinkle evenly with the 1.5 cups plump raisins and 1.5 cups chopped walnuts. Fold the dough over itself to encase the filling, then seal the edges tightly.
Here's the thing—don't overwork the dough at this stage. You want the raisins and walnuts distributed evenly, but you don't want to break them down. If the dough resists folding, wet your hands slightly to help it stick together. Shape the dough into a round loaf and place it back in the mixing bowl.
First Rise and Shaping for Optimal Texture
Cover the bowl with a damp towel and let the dough rise in a warm place for 1-1.5 hours, or until it has nearly doubled in size. The dough should be light and airy, with visible bubbles on the surface. If it rises too quickly, the bread will be dense—this is why controlling the environment matters.
Once risen, punch down the dough to release air, then shape it into a 12-inch round loaf on a parchment-lined baking sheet. Brush the top with a little melted butter to create a golden crust. Sprinkle 0.25 cup cornmeal around the base to prevent sticking and add texture to the crust.
Second Rise and Bake to Golden Perfection
Cover the shaped loaf with a damp towel and let it rise for another 45-60 minutes until it has puffed slightly. Preheat your oven to 375°F while the dough rises—this ensures even baking. Bake the bread for 30-35 minutes until the crust is deep golden brown and the internal temperature reaches 190°F.
For that signature crispy crust, I like to bake the bread on the middle rack and rotate it halfway through. The moment it pulls away from the sides of the pan and smells like warm, buttery heaven, it's done. Let it cool on a wire rack for 20 minutes before slicing—this prevents the loaf from falling apart.
Pro Tips For Making Artisan Raisin Walnut Bread
- Bloom Yeast Properly: Sprinkle that active dry yeast into the warm water with a pinch of sugar first—wait 5–10 minutes until it’s frothy and bubbly before adding anything else. I’ve ruined doughs by skipping this, and it’s the difference between a light, airy loaf and a dense brick.
- Toast Your Walnuts: Dry-toast the walnuts in a skillet over medium heat for 3–4 minutes until fragrant and golden—no oil needed. This cuts bitterness and makes them taste richer in the bread. (Yes, even if you’re impatient like me, don’t rush this.)
- Knead Until Smooth: Stop when the dough passes the “windowpane test”—stretch a piece and it should be thin enough to see light through without tearing. Over-kneading makes gluten tough, and under-kneading leaves gaps. Aim for 8–10 minutes by hand or 5–6 on a stand mixer.
- Proof at Room Temp: Skip the fridge—let the dough rise in a warm spot (like the oven with the light on) for 1–1.5 hours until it’s almost doubled. Cold proofing slows flavor development, and this ensures a proper rise without overproofing. (Your future self will thank you.)
Pro cooking tips for artisan raisin walnut bread
Yeast Activation
Never skip this step—proper yeast activation is the foundation of your bread. Use 110°F water (test with your finger—should feel warm but not hot). I've learned the hard way that too-hot water kills yeast, while too-cold water slows activation.
Let the yeast sit until you see frothy bubbles within 5-10 minutes. If it doesn't bubble, toss it and start fresh with new yeast—this is non-negotiable for a good rise. 💫
Dough Temperature
Your kitchen's temperature affects everything. If your dough feels too sticky after kneading, it's likely too warm. Keep your workspace cool by working near an open window or using a stone countertop (they stay cooler than wood).
I keep a thermometer nearby—ideal dough temperature is 75-78°F. For warm kitchens, chill the dough for 20 minutes before shaping. This prevents overproofing and ensures a light texture.
Kneading Mastery
Most home bakers over-knead, which develops too much gluten and makes bread dense. Knead by hand for 8-10 minutes or with a stand mixer on medium speed for 5-7 minutes until the dough pulls away from the bowl.
Test by doing the windowpane test: stretch a small piece—if it's thin enough to see light through, you're good. Over-kneading happens when the dough becomes smooth and elastic too quickly. Trust your hands over the timer here.
Raisin/Walnut Folding
The secret to even distribution is gentle folding. After flattening the dough slightly, sprinkle the raisins and walnuts evenly—don't dump them all in one spot. Fold the dough like a letter: bring one side over, then the opposite side, and seal the edges tightly.
This creates pockets where the fruit and nuts get trapped without breaking. Wet your hands slightly if the dough resists—this helps it stick together without overworking. The goal is even distribution without crushing.
Proofing Environment
Proofing fails when the environment is wrong. Use a warm, draft-free spot—I place my dough in a turned-off oven with a bowl of hot water underneath. The dough should rise until it's nearly doubled in size with visible bubbles.
If it rises too quickly (under 45 minutes), your kitchen is too warm. For slow rises (over 2 hours), it's too cold. Aim for 1-1.5 hours at room temperature for perfect texture.
Crust Development
That golden, crackly crust comes from two key moves: melted butter brushing and cornmeal sprinkling. Brush the risen dough with melted butter before baking—this creates steam that helps the crust develop. Sprinkle cornmeal around the base to prevent sticking and add texture.
For extra crispiness, bake on the middle rack and rotate the pan halfway through. The crust should pull away from the sides easily when done—this is your cue to remove it from the oven. 🔥
Nutrition facts
Frequently asked questions
Can I substitute walnuts for another nut in this recipe?
Pecans or almonds work beautifully, though they'll change the flavor profile slightly. For texture, hazelnuts are another great option. Just be aware that some nuts (like pistachios) may become too soft after baking. Toast your chosen nuts first for maximum flavor—this makes all the difference in that satisfying crunch.
Why did my bread turn out dense instead of light and airy?
Most likely, your yeast didn't activate properly or you over-kneaded the dough. Always test yeast activation first—it should bubble within 5-10 minutes in 110°F water. For dense bread, try proofing in a warmer environment (like a turned-off oven with hot water underneath) and avoid kneading longer than 7 minutes with a stand mixer. The dough should be soft, not elastic.
How do I store this bread to keep it fresh?
Wrap the cooled loaf tightly in plastic wrap or place it in an airtight container. Store at room temperature for 2-3 days—this preserves that perfect crust-to-crumb ratio. For longer storage, freeze the bread (up to 3 months) by wrapping it first in plastic, then in foil. Toast slices directly from frozen for best results.
Can I make this bread without eggs?
Yes! Replace the 2 eggs with 2 tablespoons ground flaxseed mixed with 6 tablespoons water (let it sit for 5 minutes to gel). For extra richness, add 1 tablespoon melted butter to the dough. The texture will be slightly denser but still delicious. This vegan version works perfectly for those avoiding eggs.
What's the best way to reheat slices?
For that fresh-from-the-oven taste, wrap slices in foil and warm in a 350°F oven for 5-7 minutes. Or use the toaster on medium heat for 2-3 minutes until golden and crispy. Avoid microwaving—it makes the crust soggy. Pro tip: Brush warm slices with a little melted butter for extra flavor.