
Side Dishes
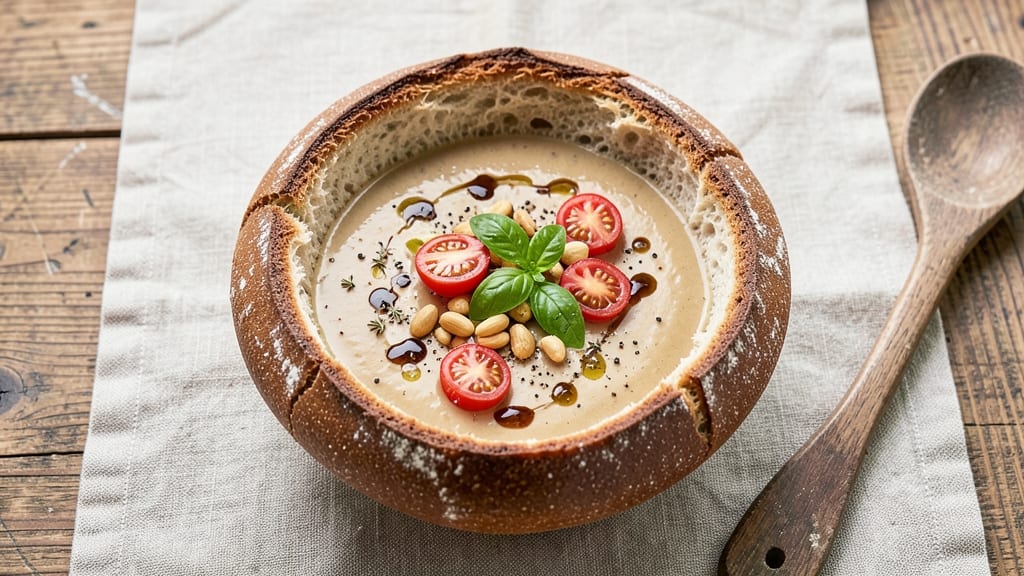
Transforming a loaf of artisan sourdough into a hollowed bread bowl creates a vessel as delicious as the meal it holds. The key lies in baking the dough until it's sturdy enough to withstand hearty soups or stews without crumbling.
This technique turns a simple loaf into a rustic, edible bowl that elevates any meal to restaurant-quality status. The crust develops a deep golden color, while the interior remains soft and flavorful—perfect for soaking up every last drop of your favorite soup.
Creating this bread bowl begins with shaping the dough into a loaf, scoring the top for even expansion, and baking it until fully set. Once cooled, you carefully hollow out the center, leaving just enough structure to hold your filling.
The result is a sturdy, flavorful bowl that doubles as both the container and the main event. This method ensures your bread bowl can handle thick, chunky soups or stews without falling apart, making it a game-changer for meal prep or entertaining.
The beauty of this recipe is its versatility. Use it for a cozy bowl of chili, a creamy tomato soup, or even a fresh salad with a tangy vinaigrette. The sourdough’s natural tang complements rich flavors while adding a satisfying crunch.
Whether you're serving a crowd or treating yourself to a comforting meal, this bread bowl delivers on both taste and presentation.
With just a few extra steps beyond baking a standard loaf, you’ll create a dish that’s as impressive as it is functional. The hollowed center ensures your filling stays warm and contained, while the crust adds a rustic charm.
Perfect for weeknight dinners or special occasions, this artisan sourdough bread bowl is a must-try for anyone who loves hands-on, flavorful cooking.
Ingredients for artisan sourdough bread bowl
Pantry staples plus a few key ingredients transform ordinary dough into a sturdy, edible bread bowl.
| Ingredient | Amount | Notes |
|---|---|---|
| Active Sourdough Starter 🍞 | 1 cup | Unfed, bubbly starter (100% hydration) |
| All-Purpose Flour 🌾 | 4 cups | High-protein for structure (12-13%) |
| Bread Flour 🌾 | 1 cup | Boosts oven spring and chew |
| Granulated Sugar 🍚 | 1 ½ tbsp | Feeds starter, enhances browning |
| Salt 🧂 | 1 ½ tsp | Diamond Crystal preferred (coarse) |
| Water 💧 | 1 ½ cups | Room temp (70-75°F) |
| Olive Oil 🫒 | 1 tbsp | Extra-virgin for flavor |
| Cornmeal 🌽 | 2 tbsp | For dusting parchment |
| Egg Wash 🥚 | 1 whole | Beaten with 1 tbsp water |
| Coarse Sea Salt 🧂 | 1 tsp | For scoring (Maldon preferred) |
| Soup or Stew Filling 🍲 | 4 cups | Your choice of hearty filling |
The sourdough starter is non-negotiable here—it's what gives your bread bowl that signature tang and chew. King Arthur or Boudin Bakery starters are my go-to if you're buying, but a well-fed homemade starter works just as well. Look for one that's bubbly and has doubled in size after 4-6 hours. The bread flour adds that professional bakery texture, but King Arthur or Bob's Red Mill all-purpose works in a pinch. Water temperature matters too—too hot and your dough gets gummy; too cold and it won't activate properly. Aim for room temp (70-75°F) or let it sit for 10 minutes after heating.
No bread flour? Add 1 extra tablespoon of all-purpose flour—it won't be identical but still sturdy enough. Short on time? Store-bought sourdough loaves (like those from Whole Foods or local bakeries) can be repurposed—just bake them longer (10-15 minutes extra) to get that extra-crisp crust. The cornmeal is just for dusting, but if you're out, semolina or all-purpose flour work too. For the egg wash, aquafaba (chickpea brine) makes a great vegan substitute—just whisk it until frothy. And if you're making this ahead? Shape the dough, cover, and refrigerate overnight for even better flavor development.
This bread bowl keeps beautifully—3 days at room temp wrapped in a clean kitchen towel, or 1 week refrigerated in an airtight container. For longer storage, freeze the unfilled bowl (before hollowing) for up to 3 months. To reheat, bake at 350°F for 5-10 minutes until crisp. Pro tip: I always make an extra bowl or two—they're perfect for gift baskets or last-minute entertaining. Just store them in a bread box or paper bag to keep them fresh longer.
Why You'll Love This Recipe
- No-Knead Magic: I swear by this dough—just mix, shape, and let it rise while you handle the rest of dinner. The sourdough starter does all the hard work, so I’m not stuck kneading for hours.
- Tangy Crust, Soft Core: That crispy, caramelized crust with a pillowy interior? It’s the sugar and bread flour combo working wonders. Honestly, the first bite makes me forget about store-bought bread entirely.
- Game for Any Meal: Use it as a bowl for chili, a serving tray for dips, or even a rustic plate for charcuterie. I’ve served it at potlucks, weeknight dinners, and holiday feasts—it’s that adaptable.
- Leftovers? Better Than Fresh: The flavor actually deepens overnight, so I bake an extra one. Toast slices the next day for croutons or garlic bread—no waste, just more deliciousness.
Step-by-step instructions for artisan sourdough bread bowls
Here's how to shape, bake, and hollow these rustic loaves into perfect soup vessels.
Mix and Knead the Dough
In a large bowl, combine the 1 cup active sourdough starter, 4 cups all-purpose flour, 1 cup bread flour, 1.5 tablespoons granulated sugar, and 1.5 teaspoons salt. Add the 1.5 cups room-temperature water and 1 tablespoon olive oil, then mix with a wooden spoon until just combined—you'll see a shaggy mass form.
Turn the dough onto a lightly floured surface and knead for 8-10 minutes until smooth and elastic. The dough should spring back slowly when poked. If it's too sticky, add 1 tablespoon flour at a time; if too dry, add 1 teaspoon water. This kneading develops gluten, which gives your bread bowl its structure and chew.
Shape and Hollow the Dough
Divide the dough into 4 equal pieces (about 12 ounces each). Roll each piece into a 12-inch log, then shape into a loose oval. Press your thumb into the center to create a 3-inch-wide hole, working the dough outward to form a thick, sturdy ring. The walls should be about ½-inch thick—this ensures they hold up when hollowed later.
Place each shaped dough ring on a parchment-lined baking sheet, seam-side down. Cover with a damp towel and let rise at room temperature for 1.5-2 hours, or until nearly doubled in size. You'll know it's ready when the dough springs back slowly when gently pressed and the hole widens noticeably.
Pre-Bake for Structure
Preheat your oven to 425°F. Brush the risen dough rings with the egg wash (beaten whole egg + 1 tablespoon water), then sprinkle generously with 2 tablespoons cornmeal on the baking sheets. This creates a crispy bottom and prevents sticking. Bake for 15-18 minutes until the edges are golden brown and the dough feels firm to the touch.
Remove from the oven and immediately use a small serrated knife to carefully hollow out the center, leaving ½-inch thick walls. The dough should hold its shape—if it collapses, let it cool slightly before proceeding. Place the hollowed bread bowls back in the oven for 5-7 minutes to firm up the walls further.
Finish Baking and Fill
Increase oven temperature to 375°F. Brush the exterior of each bread bowl with more egg wash and sprinkle with 1 teaspoon coarse sea salt. Bake for 12-15 minutes until deeply golden and hollowed bowls sound hollow when tapped. Let cool for 10 minutes before carefully transferring to a wire rack.
Once cooled, fill each bread bowl with 1 cup of your soup or stew filling. The warm dough will soften slightly, creating the perfect edible bowl. Serve immediately while the bread is still warm and crispy—this is when it's at its best for holding soups without falling apart.
Pro Tips For Making Artisan Sourdough Bread Bowl
- STRETCH AND FOLD: Use a bench scraper to fold the dough—it’s faster and gives you cleaner, tighter layers. I used to slap it around with wet hands, and the gluten ended up uneven. A scraper cuts through the dough like butter and keeps your knuckles dry.
- WEIGH YOUR FLOUR: Ditch the cups. Bread flour and all-purpose flour behave differently by volume, and sourdough’s hydration is picky. Use a scale—500g of bread flour isn’t the same as 500g of all-purpose, even if it looks identical. Trust me, your dough will thank you later.
- HOLLOW IT EARLY: Skip the last 10 minutes of bake time before hollowing. Let the bowl cool slightly (10–15 minutes), then scoop out the center with a spoon—it’ll be easier and less messy. I learned this after trying to carve a still-hot loaf and ending up with a crumbly disaster.
- SALT THE WATER: Add salt to the water you mix your starter with—just a pinch. It’s not in the recipe, but it speeds up fermentation slightly and gives your starter a little more structure. I was skeptical until I tried it; my starter now doubles faster and holds its shape better.
Perfect pairings for this recipe
Soup Pairings
A hearty tomato basil soup is my go-to pairing—its acidity cuts through the sourdough's richness while the warm bread soaks up every creamy drop. For extra depth, add a dollop of ricotta cheese and fresh basil on top.
The contrast of tangy soup and nutty bread creates a perfect balance. 🍲
Stew Combinations
Thick, chunky beef bourguignon is ideal for these bread bowls thanks to its deep flavors and meaty texture. The crusty sourdough handles the sauce beautifully, while the tender beef melts in your mouth.
For a vegetarian option, try a mushroom and lentil stew—the earthy flavors complement the bread's tang perfectly.
Salad Fillings
For lighter meals, fill your bread bowl with a warm kale and farro salad tossed in lemon vinaigrette. The crisp greens and chewy grains contrast nicely with the soft, toasted bread. Add crumbled goat cheese and toasted walnuts for extra texture and richness.
Dessert Twist
Don't stop at savory—transform your bread bowl into a dessert vessel! Fill with warm apple compote and vanilla ice cream, then top with caramelized pecans. The crisp crust and soft interior make it feel like a gourmet treat without the fuss. 🍏
Drink Pairings
A crisp Sauvignon Blanc enhances the tangy sourdough, while a robust red like Cabernet Sauvignon stands up to hearty stews. For non-alcoholic options, try sparkling apple cider—its effervescence cleanses the palate between bites. The key is balancing the bread's acidity with complementary flavors.
Garnish Ideas
Finish with fresh parsley or chives for a pop of color, or sprinkle everything bagel seasoning for a salty crunch. A drizzle of truffle oil adds luxury, while a sprinkle of freshly cracked black pepper brings out the bread's natural flavors.
These small touches elevate the dish from homemade to restaurant-worthy.
Nutrition facts
Frequently asked questions
Can I make these bread bowls without a sourdough starter?
Not traditionally, but you can use a commercial sourdough loaf from a bakery or grocery store. Look for a loaf with a thick crust and dense crumb—it should hold up when hollowed. Bake it longer (10-15 minutes extra at 350°F) to crisp the crust before hollowing. The flavor won't be as tangy, but the structure will work!
How do I prevent my bread bowl from collapsing when I hollow it?
Bake the dough until fully set—it should sound hollow when tapped and have a firm crust. Let it cool for 10-15 minutes before hollowing to avoid weakening the structure. Keep walls at least ½-inch thick, and avoid overfilling with hot liquids (like boiling soup) until the bowl has fully cooled.
What's the best way to reheat a filled bread bowl?
For best results, reheat empty bowls in a 350°F oven for 5-7 minutes to crisp the crust, then fill with warm soup or stew. If reheating a filled bowl, cover with foil and warm at 300°F for 10 minutes—this prevents sogginess. Avoid microwaving, as it makes the bread gummy.
Can I make these bread bowls ahead of time?
Shape the dough, cover, and refrigerate overnight for deeper flavor. Bake as directed, then store unfilled bowls in an airtight container for 3 days at room temp or 1 week refrigerated. Hollow and fill just before serving to maintain crispness. For longer storage, freeze unfilled bowls for up to 3 months.
What if my dough doesn't hold its shape when shaping?
This usually means the gluten needs more development. Knead 5-10 minutes longer or let the dough rest 20 minutes before shaping to relax the gluten. If it's still too sticky, chill the dough for 30 minutes before shaping—this helps tighten the structure. Avoid overproofing, as that weakens the dough.