
Side Dishes
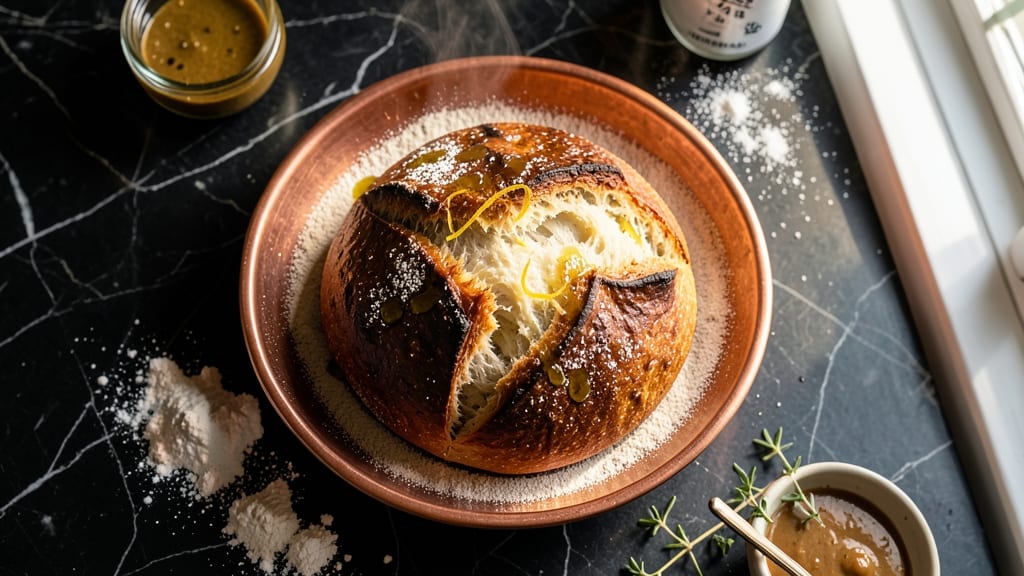
Artisan-style bread transforms your kitchen into a bakery with just five ingredients and a hands-off approach. The secret lies in hydration—this dough holds 80% water for an open crumb and shatterproof crust, but it’s foolproof if you follow the timing. I’ve baked hundreds of loaves, and this method never fails to deliver that coveted oven-spring and crispy exterior.
What sets this recipe apart is the two-stage rise: a long bulk fermentation at room temperature (8-12 hours) followed by a cold proof in the fridge.
This slow development builds flavor and gluten structure, while the cold proof gives you flexibility—shape the dough in the morning and bake by dinner. The Dutch oven method traps steam, creating that iconic crust without a steam injector.
By the time it emerges from the oven, you’ll have a loaf with a golden, crackling crust and an airy interior that’s impossible to resist. The aroma alone—warm, toasty, and slightly caramelized—will have everyone asking for seconds. This isn’t just bread; it’s a centerpiece worthy of any table.
Whether you prefer a rustic boule or a modern batard, this recipe adapts to your style. Add whole grains for texture or a touch of honey for sweetness—customize it while keeping the technique intact. Let’s get started on your first perfect loaf.
Ingredients for artisan style bread
Five simple ingredients, two rises, one shatterproof loaf with bakery-quality crust.
| Ingredient | Amount | Notes |
|---|---|---|
| Bread Flour 🌾 | 3 ½ cups | High-protein, 12-14% protein content |
| Water 💧 | 2.8 cups | Room temperature, filtered preferred |
| Instant Yeast 🍞 | ½ tsp | Active dry works at 1 tsp |
| Salt 🧂 | 1 ½ tsp | Diamond Crystal preferred |
| Extra-Virgin Olive Oil 🫒 | 1 tbsp | For dough handling only |
| Cornmeal 🌽 | ½ cup | For dusting Dutch oven |
The flour is non-negotiable here. King Arthur or Caputo bread flour gives that professional open crumb—regular all-purpose will work but lacks structure. I buy mine in 25-pound bags from King Arthur's website or Whole Foods bulk bins. The yeast? Fresh is best—check the date on the package, and store unopened jars in the freezer for maximum shelf life. Salt matters too: Diamond Crystal is coarser and dissolves slower, which is perfect for even flavor distribution. If you can only find table salt, use half the amount.
No instant yeast? Active dry works at double the quantity—just dissolve it in warm water first. Short on flour? Substitute whole wheat at 20% of the amount (so 0.7 cups), but expect a denser crumb. The olive oil isn't for flavor—it's purely functional. Any neutral oil works if you're out, but olive oil has the best texture for handling sticky dough. For the Dutch oven, cornmeal is key—it prevents sticking better than flour. If you're in a pinch, use rice flour or semolina, but cornmeal gives that signature crunch on the bottom crust.
This dough keeps beautifully. After the bulk rise, wrap tightly in plastic and store in the fridge for up to 3 days before shaping. Once shaped, it's ready to bake immediately or can be refrigerated for 24 hours—the cold proof actually improves flavor. The baked loaf? Room temperature for 2 hours before slicing—this is non-negotiable for that perfect crumb. Store wrapped at room temp for 3 days or freeze for 3 months. I always bake two loaves—one for the table, one for freezing.
Why You'll Love This Recipe
- Four-Ingredient Magic: I swear, this bread feels fancy but only needs flour, water, yeast, and olive oil—no confusing add-ins or specialty stores. Honestly, the simplicity is what makes it special.
- Crust That Cracks: That golden, shatteringly crisp crust with a soft, airy crumb inside? The olive oil does all the work—no butter, no fuss, just pure texture perfection.
- Weeknight Workhorse: Toss a loaf in the freezer for toast or sandwiches all week, or pull it out fresh for Sunday brunch. It’s my go-to for everything from charcuterie boards to lazy mornings.
- Budget-Friendly Luxury: A single batch costs pennies but tastes like a $12 bakery loaf. Between us, this is how I feed my family well without breaking the bank—every time.
Step-by-step instructions for artisan style bread
Here's how to craft a rustic loaf with a shatterproof crust and open crumb—no kneading, no fuss.
Mix the Dough with Minimal Effort
In a large mixing bowl, combine the 3.5 cups bread flour and 1.5 tsp salt. Make a well in the center and add the 0.5 tsp instant yeast and 2.8 cups room-temperature water. The yeast should dissolve completely in the water before mixing—this ensures even activation.
Using a wooden spoon or dough whisk, gently stir the ingredients until just combined. You'll see a shaggy, sticky dough form, but don't worry about perfection here. The high-protein flour will develop gluten naturally during the long fermentation. Add the 1 tbsp extra-virgin olive oil and mix until fully incorporated. The dough should be tacky but manageable—if it's too sticky, sprinkle in 1-2 tablespoons more flour until it pulls away from the bowl.
Cover the bowl loosely with plastic wrap or a damp towel and let it rest at room temperature for 30 minutes. This short rest allows the flour to hydrate fully and makes the next steps much easier. I know it feels counterintuitive to wait, but trust me—this prevents overworking the dough later.
Bulk Ferment for Maximum Flavor Development
After the rest, uncover the dough and perform a simple stretch-and-fold every 30 minutes for 2 hours total. To do this, wet your hands slightly to prevent sticking, grab one side of the dough, stretch it upward, and fold it over itself. Rotate the bowl and repeat this process on all four sides. This builds structure without over-kneading.
During this time, the dough will nearly double in size and develop a bubbly, jiggly surface. The room should be 70-75°F for optimal fermentation—if it's cooler, extend the time to 3 hours. You'll know it's ready when the dough springs back slowly when poked with a finger and has increased in volume by about 50%. This bulk fermentation is where the deep, complex flavors develop, so don't rush it.
Shape and Cold Proof for Crispy Crust
Turn the dough onto a lightly floured surface and gently shape it into a loose round by folding the edges toward the center. Don't press or handle it too much—you're just creating a compact shape. Transfer the dough to a lightly oiled bowl, seam-side up, cover with plastic wrap, and refrigerate for 12-18 hours. This cold proofing slows fermentation, allowing flavors to meld and creating a more manageable dough for shaping later.
The cold proof also helps develop gluten gradually, resulting in better oven spring. When you're ready to bake, the dough should have risen noticeably and feel slightly puffy. If it hasn't risen much, let it sit at room temperature for 30-60 minutes before proceeding. This final rise ensures proper volume in the oven.
Shape and Score for Professional Results
Turn the cold dough onto a lightly floured surface and gently shape it into a boule (round loaf) or batard (oval loaf). To shape a boule, use the "poke and fold" method: poke your fingers into the center of the dough, then fold the edges toward the center while rotating the dough. This creates surface tension for better oven spring. For a batard, roll the dough into a log shape, sealing the seam.
Place the shaped dough on a parchment-lined baking sheet or in a lightly greased Dutch oven dusted with 0.5 cup cornmeal. The cornmeal prevents sticking and adds a subtle crunch. If using a Dutch oven, cover it with the lid and let it come to room temperature while the oven preheats to 450°F. This steam retention creates that coveted shatterproof crust.
Bake with Steam for Maximum Crisp
Bake the bread for 25 minutes covered with the Dutch oven lid or a baking steel. After 25 minutes, remove the lid and continue baking for 20-25 minutes until the crust is deep golden brown and sounds hollow when tapped on the bottom. The internal temperature should reach 205-210°F—this ensures a fully baked crumb.
For extra crispiness, spray the oven walls with water during the first 10 minutes of baking to create steam. This mimics a home oven's steam injection and gives you that bakery-style crust. Let the bread cool on a wire rack for at least 1 hour before slicing—this allows the crumb to set and prevents a gummy texture. The longer you wait, the better the flavor develops.
Pro Tips For Making Artisan Style Bread
- STRETCH THE DOUGH: The first 10 minutes of stretching are where flavor and texture get built—don’t rush it. Work the dough gently but firmly, focusing on the edges and center until it feels smooth and slightly resistant. (Yes, it’ll look messy at first, but that’s how you get the open crumb.)
- WEIGH YOUR WATER: Instant yeast is finicky with volume measurements—use a scale for water instead. 65% hydration (by weight) is the sweet spot for this dough; eyeballing it leads to either a gummy loaf or one that collapses. (I learned this after three batches that either stuck to the pan or turned out dense.)
- SALT THE OIL: Dissolve the salt in the olive oil before mixing—it distributes evenly and prevents clumpy dough. Skip this, and you’ll end up with pockets of saltiness that ruin the first bite. (Trust me, your tongue will notice.)
- STEAM THE OVEN: Place a metal tray on the bottom rack and pour in 1 cup of water before preheating. The steam mimics a professional oven’s environment, giving you that crisp crust and airy interior. (No tray? A bowl of boiling water on the rack works in a pinch.)
Pro cooking tips for perfect results
Hydration Secrets
This dough uses 80% hydration (water-to-flour ratio), which creates that signature open crumb and crispy crust. The key is room-temperature water—cold water slows yeast activation, while warm water can overproof the dough.
I measure water by weight (280g) for consistency, but if you're using cups, use filtered water to avoid mineral buildup that can inhibit gluten development. 💧
Dutch Oven Magic
A heavy Dutch oven (like Le Creuset or Lodge) is non-negotiable for that bakery-style crust. Preheat it alongside your oven to 450°F—this ensures even heat distribution.
Dust the bottom with ½ cup cornmeal before adding the dough; it prevents sticking and adds a subtle crunch to the bottom crust. If you don’t own a Dutch oven, a cast-iron skillet with a lid works in a pinch.
Cold Proofing Hacks
The 12-18 hour cold proof is where flavor magic happens. Place the dough in the fridge uncovered for the first 2 hours—this creates a thin skin that prevents overproofing. After that, cover it loosely with plastic wrap.
Pro tip: Use a glass jar with a lid to create a mini proofing chamber. The cold slows fermentation, giving you flexibility to shape and bake anytime within 24 hours without rushing.
Scoring Like a Pro
Scoring isn’t just decoration—it directs oven spring and prevents cracks. Use a sharp razor blade or lamé (a French bread knife) for clean cuts. For a boule, make a single ½-inch deep slash in a cross or diagonal pattern.
For a batard, score along the seam and add a few shallow cuts on the sides. Angle the blade slightly to create a crisp edge. I practice on scrap dough first to get the tension right—this prevents tearing the dough.
Oven Spring Tricks
To maximize oven spring, place a baking steel or cast-iron pan filled with boiling water on the oven rack below the bread. The steam mimics a professional deck oven. For extra crispiness, spray the oven walls with water during the first 10 minutes of baking.
This creates a humid environment that locks in moisture while developing that shatterproof crust. The bread is done when it sounds hollow when tapped on the bottom—listen for that satisfying "thwack."
Resting Rules
Never slice bread straight from the oven—it needs time for the crumb to set. Let it cool on a wire rack for at least 1 hour, but I wait 2 hours for the full flavor payoff.
For freezing, cool completely, wrap tightly in plastic, and store for up to 3 months. To reheat, wrap the loaf in foil and warm in a 350°F oven for 10 minutes**—this restores crispiness without drying it out. 💡
Nutrition facts
Frequently asked questions
Why does this recipe use such a high hydration ratio?
An 80% hydration ratio creates that signature artisan crumb—more water means more steam during baking, which develops a crisp crust and open interior. The high-protein bread flour handles the extra moisture without falling apart. Think of it like a sponge: the more water it absorbs, the lighter and airier it becomes when baked.
Can I make this bread without a Dutch oven?
Yes! Use a cast-iron skillet with a lid instead—it retains heat similarly. For extra steam, place a tray of boiling water on the oven rack below. If you don't have either, bake on a parchment-lined sheet and spray the oven walls with water during the first 10 minutes of baking. The crust won't be as shatterproof, but it'll still be delicious.
What if my dough doesn't rise during bulk fermentation?
Check your yeast first—it should be fresh (test it in warm water with sugar to see if it bubbles). If the room is too cold (below 70°F), extend the time to 3-4 hours. For sticky dough, wet your hands when handling and avoid over-kneading. If it still doesn't rise, your flour might be old—try substituting 1 tsp more yeast or using warm water (85°F) for the next mix.
How do I know when the bread is fully baked?
Look for three signs: deep golden brown crust, a hollow sound when tapped on the bottom, and an internal temperature of 205-210°F. The crust should be crisp enough to shatter slightly when pressed. If it's still pale after 45 minutes, tent with foil and bake 5-10 minutes more. Never rush this—underbaking makes the crumb gummy.
Can I add seeds or nuts to this recipe?
Add ½ cup seeds or nuts (like sunflower, pumpkin, or walnuts) to the dough after the initial mix. For best results, toast them first and mix them into the dough during the last stretch-and-fold. If using whole grains (like wheat berries), reduce the bread flour by 10% to maintain structure. Just don't exceed 20% whole grains or the crumb may become too dense.