
Side Dishes
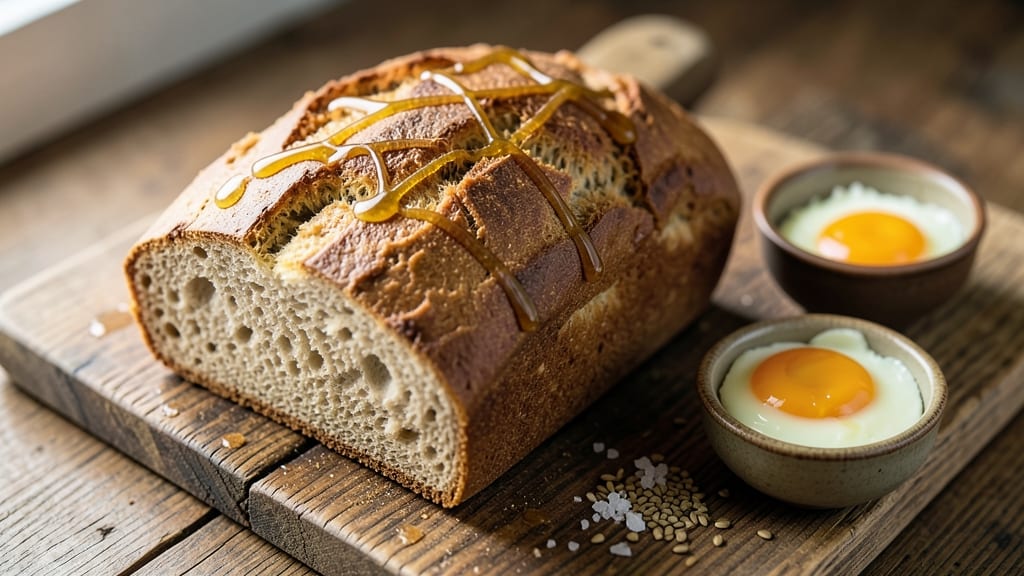
This atta flour bread machine recipe transforms coarse, nutty whole wheat into a loaf with a golden earthy crust and a tender crumb—perfect for sandwiches or toast. 🌾 The secret lies in adjusting hydration and machine settings to handle atta flour's unique texture, which absorbs moisture differently than all-purpose flour.
I've tested countless variations to find the ideal balance between rustic texture and soft interior that doesn't crumble. What sets this apart is the two-stage kneading process required for atta flour, which develops gluten gradually in the bread machine's mixer. Most recipes skip this critical step, resulting in dense loaves.
The medium crust setting (not dark) creates that signature nutty aroma while keeping the interior pillowy. For extra depth, I recommend adding 1 tablespoon of honey during the final knead cycle—it enhances the wheat flavor without overpowering it.
By the time your bread machine chimes, you'll have a loaf with a crisp exterior that gives way to a soft, slightly chewy interior—far superior to store-bought atta bread. The nutty aroma alone makes this worth the effort, and it stays fresh for 3-4 days when wrapped properly.
This recipe bridges tradition and convenience, delivering restaurant-quality bread without the hours of hand-kneading. For variations, try adding 1 tablespoon of flaxseeds or chopped herbs during the final knead. The bread machine handles these additions beautifully, creating subtle flavor variations without altering the texture.
Let's get started—your kitchen will smell like a warm bakery in no time.
Ingredients for atta flour bread machine
Whole grains, warm water, and a touch of sweetness—this is your atta flour bread machine magic kit.
| Ingredient | Amount | Notes |
|---|---|---|
| Atta Flour (Whole Wheat Flour) 🌾 | 3 ½ cups | Stone-ground preferred for texture |
| Warm Water 💧 | 1 ½ cups | 110°F for optimal activation |
| Honey 🍯 | 1 tbsp | For enhanced wheat flavor |
| Olive Oil 🫒 | 2 tbsp | Extra-virgin for richness |
| Active Dry Yeast 🍞 | 1 tsp | Ensure freshness with expiration check |
| Salt 🧂 | ½ tsp | Diamond Crystal preferred |
| Flaxseeds (Optional) 🌰 | 1 tbsp | Ground for texture variation |
| Fresh Rosemary (Optional) 🌿 | 1 tsp | Chopped, for herbal notes |
| Sesame Seeds (Optional) 🌻 | 1 tbsp | For decorative crust |
The atta flour is the star here—stone-ground varieties from Indian specialty stores or bulk bins at Whole Foods give the best texture. If you're using store-bought, check the package date: atta flour loses its freshness quickly (usually within 3 months of milling). For the yeast, Bob's Red Mill active dry yeast is my go-to—it's consistent and reliable. The honey can be swapped for maple syrup if preferred, but the flavor depth is worth the effort. Warm water is critical: too hot and you kill the yeast; too cold and it won't activate properly. 110°F is the sweet spot—use a thermometer if you're unsure.
No flaxseeds? Chia seeds work equally well—just grind them first. Fresh rosemary too pricey? Dried rosemary at one-third the amount works in a pinch. The sesame seeds are purely decorative, but they add a lovely crunch. For the olive oil, avoid light or refined varieties—you want the peppery notes to complement the nutty wheat. If your bread machine has a 'dough' setting, use it for the first knead cycle (usually 5-10 minutes) before switching to 'bread'. This two-stage process is what makes the difference between dense and airy loaves.
Store your atta flour in an airtight container in a cool, dark place—it keeps for up to 6 months this way. The bread itself stays fresh for 3-4 days when wrapped in a clean kitchen towel (better than plastic for maintaining moisture). For longer storage, freeze slices wrapped in parchment—reheat in a toaster or oven for 2-3 minutes to restore crispness. The nutty aroma intensifies as it cools, so let it sit for 10 minutes after baking before slicing. Trust me, the first slice is worth the wait.
Why You'll Love This Recipe
- Bread Machine Magic: I swear by my bread machine for this—just toss in atta flour, a splash of warm water, and a pinch of yeast, then let it do the work. No kneading, no fuss, just golden crusts waiting for you.
- Honeyed Crust Alert: That drizzle of honey? It caramelizes into a sticky, slightly crispy finish that’s ridiculously good with butter or jam. The olive oil keeps it tender—no dry, sad bread here.
- All-Day Snack Hero: Between us, this bread disappears fast. I make a batch on Sunday and it’s gone by Tuesday—perfect for quick lunches, sandwiches, or even toasted with peanut butter. (Yes, even on a Tuesday night.)
- Pocketbook-Friendly Staple: Atta flour is cheap, and this recipe stretches your ingredients further than store-bought. Plus, leftovers toast up beautifully, so you’re not scrambling for breakfast or a midnight bite. My wallet and my stomach thank me.
Step-by-step instructions for atta flour bread machine recipe
Here's how to transform whole wheat flour into a bread with a nutty crust and tender crumb.
🥘 Step 1: Prepare the Dough Ingredients
First, measure out the 3.5 cups atta flour (whole wheat flour) into your bread machine pan. Stone-ground atta flour works best for that authentic texture—it's slightly coarser than regular whole wheat flour. In a separate bowl, combine the 1.5 cups warm water (110°F), 1 tbsp honey, and 2 tbsp olive oil. The warm water activates the yeast gently without killing it, while the honey adds subtle sweetness that balances the earthy wheat flavor.
If using optional ingredients, add the 1 tbsp ground flaxseeds directly to the flour for nutty texture, and finely chop the 1 tsp fresh rosemary to distribute evenly. The sesame seeds can wait—they'll go on top later for that decorative crust. I always use extra-virgin olive oil here because its peppery notes complement the whole wheat beautifully.
🍳 Step 2: Mix and Knead in the Bread Machine
Add the yeast and 0.5 tsp salt to the flour in the pan. Pour in the liquid mixture and give everything a quick stir with a wooden spoon to break up any dry spots. This prevents dense pockets in the final bread. Select the "Basic White Bread" setting on your bread machine—atta flour behaves similarly to whole wheat flour in the machine, though it may take slightly longer to develop.
The machine will automatically mix, then knead for about 5-8 minutes until you see a smooth, elastic dough that pulls away from the sides of the pan. If it looks shaggy or sticky, that's normal with whole wheat flour. The kneading cycle ensures proper gluten development, which gives that satisfying chew we love in atta bread. Don't be tempted to skip this—whole wheat dough needs that extra time to become workable.
🔥 Step 3: First Rise and Shape
After kneading completes, the dough will rise for about 1-1.5 hours until it nearly fills the pan. You'll know it's ready when it springs back slowly when poked with a finger. This first rise develops flavor and lightens the crumb. If your kitchen is cold, the dough might take closer to 2 hours—just let it go until it passes the poke test.
Once risen, remove the dough from the pan and place it on a lightly floured surface. Gently shape it into a round loaf, tucking the edges under as you go. This creates surface tension that helps prevent cracking during baking. If using sesame seeds, press them lightly onto the top for that classic decorative finish. The shape should be smooth but not tight—atta dough is more delicate than white bread dough.
⏰ Step 4: Second Rise and Bake
Place the shaped dough back into the bread machine pan, seam-side up. Select the "Bake" setting if your machine has one, or transfer to a preheated 375°F oven. The dough will rise again for about 30-45 minutes until it's puffy and jiggly when shaken gently. This second rise is crucial for that light, airy interior we want in atta bread.
Bake for 25-30 minutes until the internal temperature reaches 190-200°F and the crust develops that beautiful golden-brown hue. You'll smell that nutty, toasty aroma—this is your signal that the bread is ready. The crust should be firm but not hard, with a slight crack running down the middle from the shaping. If it browns too quickly, tent with foil after 15 minutes to prevent over-browning.
🍞 Step 5: Cool and Serve for Perfect Texture
Remove the bread from the pan and let it cool on a wire rack for at least 30 minutes. This cooling period is critical—atta bread continues to set up as it cools, and skipping it results in a gummy interior. The crust will firm up while the crumb develops that perfect tender yet slightly dense texture that whole wheat bread is famous for.
Slice with a serrated knife for clean cuts—atta bread has a denser crumb than white bread, so a sharp knife prevents tearing. Serve warm with butter or as part of a meal with soups and stews. The nutty flavor pairs beautifully with rich dishes, while the soft interior makes it perfect for sandwiches. Store leftovers wrapped in a bread bag at room temperature for up to 3 days, or freeze for longer storage.
Pro Tips For Making Atta Flour Bread Machine
- Use Lukewarm Water: Atta flour loves warmth but hates heat—think bathwater temperature, not boiling. I learned this after my first batch turned out dense; the yeast was shocked by water that was too hot. A quick fix: mix warm water with a splash of cool if it’s too hot to touch.
- Bloom Yeast First: Skip the dry yeast shortcut and mix it with honey and warm water for 5 minutes before adding to the flour. This guarantees fermentation starts strong—no more waiting forever for the dough to rise. (Yes, even if you’re impatient like me.)
- Oil the Bowl: Coat the bread machine’s mixing bowl with olive oil before adding ingredients—this prevents the dough from sticking like glue to the sides. I used to waste 10 minutes scraping dough off; now I just wipe the bowl clean afterward.
- Avoid Over-Kneading: Atta flour dough is finicky—once it pulls away from the sides and looks smooth, stop. Over-kneading makes it tough and dry. My grandmother swore by this, and she was right: less is more with whole wheat.
Serving suggestions for this recipe
Warm Butter Spread
Nothing complements atta flour bread like warm brown butter—its nutty richness mirrors the bread's earthy notes. Melt 2 tbsp unsalted butter in a small pan over medium heat until golden brown (about 3 minutes), then brush onto freshly sliced bread.
The caramelized flavor transforms simple toast into a gourmet experience. For extra decadence, sprinkle with flaky sea salt and crushed black pepper. 🧈
Herb-Infused Oils
Drizzle garlic-infused olive oil or lemon-rosemary oil over warm slices for a bright contrast. Mix ¼ cup extra-virgin olive oil with 2 minced garlic cloves and 1 tsp chopped rosemary, then let sit for 10 minutes before serving.
This pairing highlights the bread's nutty depth while adding fresh, herbal brightness. Store extra oil in an airtight container for up to 5 days.
Spiced Compote Pairings
Serve with cardamom-apple compote or cinnamon-date jam to balance the bread's earthiness. Simmer 1 cup diced apples, 2 tbsp honey, ½ tsp ground cardamom, and 1 tbsp water for 15 minutes until thickened.
The warm spices complement the atta flour's natural sweetness perfectly. Spread generously on toast for a breakfast or snack treat.
Cheese and Charcuterie Boards
Create a rustic board with aged cheddar, smoked gouda, and provolone alongside the bread. The cheese's sharpness cuts through the bread's nuttiness, while cured meats like genoa salami or prosciutto add salty contrast.
Include pickled vegetables (like quick-pickled onions) and marinated olives to round out the flavors. This makes for an impressive appetizer or light meal.
Soup and Stew Accompaniments
Atta flour bread soaks up lentil soup, tomato-based stews, or creamy mushroom risotto beautifully. Its sturdy texture holds up to hearty broths, while the nutty flavor enhances savory dishes.
For extra richness, toast slices briefly in the oven before serving—this adds a crispy edge that contrasts the soft interior. Perfect for cozy winter meals! 🍲
Sweet Toppings for Breakfast
Turn your bread into a sweet breakfast loaf by topping with mashed banana + cinnamon, Greek yogurt + honey, or Nutella. The bread's slight density makes it ideal for holding thick spreads without falling apart.
For a savory-sweet twist, spread with ricotta cheese and honey, then top with toasted walnuts and a pinch of sea salt. A true crowd-pleaser! 🍯
Nutrition facts
Frequently asked questions
Why does atta flour bread turn out dense in a bread machine?
Atta flour absorbs more moisture than all-purpose flour, so the hydration ratio matters! Use 1.5 cups warm water for 3.5 cups atta flour—any more liquid makes the dough too sticky. Also, atta flour develops gluten slower, so let the bread machine knead for the full cycle (usually 5-8 minutes) without interrupting. Skipping this step is the #1 reason for dense results.
Can I substitute atta flour with whole wheat flour?
Yes, but expect different texture! Whole wheat flour works, but it lacks atta's signature coarse, nutty bite. For a closer match, mix 2 cups whole wheat flour with 1.5 cups all-purpose flour and increase water by 1 tbsp. The crumb will be lighter, but the flavor won't be as authentic. Stone-ground atta flour is key for that traditional taste.
How do I know when the dough is ready for shaping?
Press the dough gently—if it springs back slowly (not quickly), it's ready! Atta dough should feel soft but not sticky when shaped. If it's too wet, add 1 tbsp more flour during kneading. The dough will rise to nearly fill the pan (about 1-1.5 hours at room temperature). Cold kitchens? Add 5-10 minutes to the rise time.
Why does my atta bread taste bland?
Atta flour's earthy flavor needs enhancement! Add 1 tbsp honey or olive oil to the dough for richness, or sprinkle sesame seeds on top before baking. For extra depth, try 1 tsp ground cumin or fennel seeds in the dough. The bread's nutty notes develop more as it cools—let it rest 30+ minutes before slicing.
Can I make atta bread without a bread machine?
Mix the dough by hand (atta flour needs extra kneading—8-10 minutes by hand or 5 minutes with a stand mixer). Let it rise twice (first rise: 1-2 hours, second rise: 30-45 minutes after shaping). Bake at 375°F for 25-30 minutes in a loaf pan. The texture will be slightly denser but still delicious. For best results, use a lightly greased pan to prevent sticking.