
Side Dishes
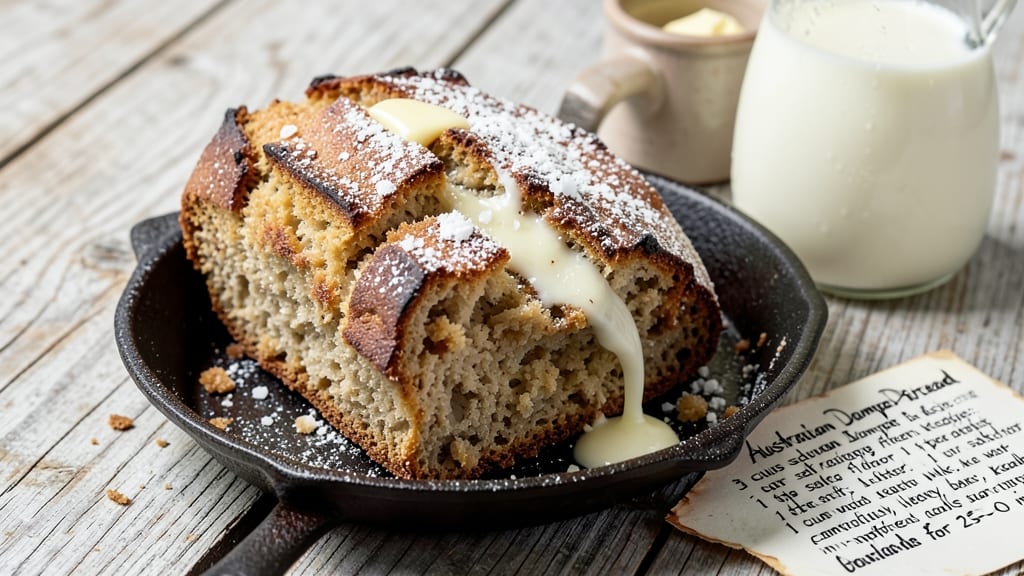
Australian damper bread recipe delivers rustic simplicity with just flour, baking powder, and milk—no yeast, no kneading, just campfire-tested tradition. This iconic bush bread originated with Australian swagmen who relied on it for sustenance during long journeys, and its no-fuss preparation makes it perfect for modern cooks too.
The key lies in achieving that signature crispy crust while keeping the interior tender and moist, whether baked in a Dutch oven or toasted over open flames.
What sets damper apart is its versatility—equally at home as a hearty side to roasted meats or as a sweet breakfast treat with honey and butter. The recipe requires just five simple ingredients that most kitchens already stock, yet transforms them into a bread with deep cultural roots.
Traditional versions were cooked in campfire ashes, but modern adaptations use oven or skillet methods for consistent results every time.
By the time your damper emerges from the oven or coals, you'll have golden-brown bread with a crisp exterior and soft, pillowy interior that's impossible to resist. The aroma alone transports you to the Australian outback, while the texture delivers that perfect balance between rustic charm and comforting familiarity.
This is bread that tells a story with every bite.
Perfect for campfire gatherings, weekend breakfasts, or as a simple side dish, damper proves that sometimes the simplest recipes create the most memorable meals. The beauty lies in its adaptability—whether you stick to classic savory versions or experiment with sweet variations, each batch carries that authentic Australian spirit.
Let's get started on making this traditional staple your own.
Ingredients for australian damper bread
Five simple ingredients transform into Australia's iconic bush bread—crispy crust, tender heart, no yeast needed.
| Ingredient | Amount | Notes |
|---|---|---|
| All-Purpose Flour 🌾 | 3 cups | Plus 2 tbsp for dusting |
| Baking Powder 🍞 | 1 ½ tsp | Ensure it's fresh |
| Salt 🧂 | 1 tsp | Kosher or sea salt |
| Unsalted Butter 🧈 | ½ cup | Cold, cubed for texture |
| Milk 🥛 | 1 ¼ cups | Room temperature preferred |
Flour is the foundation—King Arthur or White Lily brands work best for that classic texture. If you're feeling adventurous, swap 1/4 cup for whole wheat flour for a nuttier flavor. The baking powder must be fresh: if it's over a year old, toss it. Diamond Crystal kosher salt is my go-to, but any fine grain works. Butter adds richness, so use full-fat—none of that low-fat nonsense. For milk, whole milk gives the best texture, but 2% or even almond milk (unsweetened) works in a pinch. Just make sure it's room temperature or your damper might turn out dense.
No baking powder? 1 tsp baking soda plus 1 tsp cream of tartar replaces it perfectly. Short on butter? Olive oil or coconut oil works, but the flavor won't be quite the same. Milk substitute? Yogurt or sour cream (thinned with water) adds tang. For a sweet version, add 1/4 cup honey or maple syrup to the milk—trust me, it's amazing with butter. The flour-to-milk ratio is key: if your dough feels too sticky, add 1 tbsp more flour. Too dry? Add 1 tbsp milk. This bread is forgiving, but those ratios matter most.
Store leftovers wrapped in a clean kitchen towel at room temp for up to 3 days—it stays fresh longer than plastic. For extra crispiness, reheat slices in a skillet or oven for 2-3 minutes. Freeze shaped portions for up to 3 months—just thaw at room temp. Pro tip: Toast over a campfire for that authentic bushfire flavor. The best part? This bread tastes even better the next day as the crust firms up. Perfect for packing in lunches or saving for breakfast.
Why You'll Love This Recipe
- No-Fuss Mixing: The ingredients are right there—flour, butter, milk—no measuring cups, no fancy techniques. You just toss them in a bowl, knead until it holds, and pop it in the oven. That’s it. No stress, no mess.
- Buttery Crust Magic: The moment it comes out of the oven, that crispy golden crust gives way to a soft, buttery center. Honestly, the butter and milk combo makes it taste like a hug from your grandma’s kitchen—simple but impossible to resist.
- Campfire to Kitchen: Between us, this is the bread that travels everywhere. Pack it in a cooler for a bush picnic, toast it over a fire, or serve it warm with jam at home. It’s the ultimate no-bullshit bread for any day.
- Dollar Stretch Wonder: Two cups of flour, a knob of butter, and a splash of milk—that’s all it takes to feed four people. Leftovers? Toast them the next morning. Budget-friendly doesn’t get much better than this.
Step-by-step instructions for Australian damper bread
Let's make this iconic bush bread with a crispy crust and tender crumb—no yeast, no kneading, just pure simplicity.
👨🍳 Step 1: Mix Dry Ingredients for Perfect Texture
In a large bowl, whisk together the 3 cups all-purpose flour, 1.5 teaspoons baking powder, and 1 teaspoon salt. I like to use a whisk for this step to ensure the baking powder is evenly distributed—uneven distribution can lead to dense spots in your damper. The dry ingredients should look like fine, cloudy dust with no visible baking powder clumps.
Real talk: don't skip sifting if you have it. A quick sift through a fine-mesh strainer removes any lumps and aerates the flour, which helps create that light, airy crumb we're after. If you don't have a sifter, just whisk vigorously for about 30 seconds to break up any potential lumps.
🍳 Step 2: Cut in Cold Butter for Rich Flavor
Add the ½ cup cold, cubed unsalted butter to the dry ingredients. Using a pastry cutter or your fingers, work the butter into the flour mixture until it resembles coarse crumbs with pea-sized butter pieces scattered throughout. This is called "cutting in," and it's crucial for that tender, flaky texture in damper.
Here's the thing—don't overwork the butter. You want it to stay in chunks rather than melting completely. If the mixture starts looking like wet sand, you've gone too far. The butter should still be slightly firm to the touch when you finish this step. This ensures you'll get that beautiful, buttery flavor without making the bread greasy.
🥘 Step 3: Add Milk and Combine to a Rough Dough
Pour in the 1¼ cups room-temperature milk all at once and stir with a wooden spoon until the mixture comes together into a shaggy, sticky dough. It's okay if it looks messy—this is normal. The dough should hold together when pressed gently but still feel slightly sticky to the touch. If it's too dry, add 1 tablespoon more milk; if too wet, sprinkle in 1 tablespoon flour.
I know it seems weird, but trust me—this dough should be noticeably softer than traditional bread dough. The high fat content from the butter makes it more pliable. Once combined, turn the dough out onto a lightly floured surface and gently shape it into a round loaf about 3 inches thick. Don't worry about perfection here—just get it into one manageable shape.
🔥 Step 4: Bake Until Golden with a Crispy Crust
Preheat your oven to 425°F. Place the shaped damper on a baking sheet lined with parchment paper. For that authentic bushfire-toasted crust, I like to make a few shallow cuts on top with a sharp knife—about ¼ inch deep and spaced evenly. These cuts help the bread expand and give you those beautiful crispy ridges.
Bake for 25-30 minutes until the top is deep golden brown with crispy edges. The internal temperature should reach 190-200°F when measured with an instant-read thermometer. You'll know it's done when it sounds hollow when tapped on the bottom. If you don't have a thermometer, look for that perfect crust color and a pull-away-from-the-pan test—it should release easily from the edges.
⏰ Step 5: Rest and Serve Warm
Remove the damper from the oven and let it cool on a wire rack for 10 minutes. This resting period allows the steam inside to redistribute, preventing a gummy texture. The bread will be at its most tender and flavorful when served warm, so don't skip this step even if you're eager to dig in.
For serving, I like to slice it thick—about 1-inch pieces—to showcase that perfect contrast between the crispy crust and soft interior. The butter flavor should be rich but not overpowering, with a subtle sweetness from the milk. Pair it with jam, butter, or even just enjoy it plain as the Aussie bushmen would have done—simple, satisfying, and full of character.
Pro Tips For Making Australian Damper Bread
- Use a Hot Pan: Damper needs serious heat to rise properly—don’t skimp. Heat your cast iron or heavy pan until a drop of water sizzles and evaporates instantly (yes, even if you’re impatient like me). That’s the only way to get that golden crust and light texture without a dense, brick-like center.
- Cut Cold Butter in Cubes: I learned this the hard way—using melted butter makes damper greasy and heavy. Instead, grate or cut your unsalted butter into ½-inch cubes and fold them straight into the dry ingredients. They’ll melt just enough to create pockets of steam, keeping the bread tender without turning it soggy.
- Don’t Overmix the Dough: Once you add the milk, stop stirring after the flour just comes together. Overworking the dough develops gluten, and damper should be rustic, not chewy. A few lumps are fine—just fold them in until they disappear. Your future self will thank you when the crumb stays soft.
- Bake Until the Bottom Sounds Hollow: Damper’s done when the top is golden and the bottom pulls away from the pan with a faint tap. If you’re unsure, flip it out and check—if it’s pale underneath, put it back in for another 2-3 minutes. Underbaking is the fastest way to end up with a gummy mess.
Creative variations of these flavors
Sweet Bush Breakfast
Transform your damper into a sweet breakfast treat by adding ¼ cup honey or maple syrup to the milk mixture. I love this version with 2 tbsp brown sugar sprinkled on top before baking for extra caramelization.
Serve warm with butter and jam or a drizzle of warm maple syrup—it’s like a cross between cornbread and scone. 🍯
Herbed Savory Twist
For a savory damper, mix 1 tbsp dried rosemary or thyme into the flour before adding milk. Fresh herbs like chopped parsley or dill work too—just fold them in at the end.
Add ½ tsp garlic powder for depth, and top with flaky sea salt before baking. This version pairs perfectly with grilled meats or charcuterie boards.
Cheesy Damper Delight
Swap ½ cup of the milk for ½ cup shredded cheddar or Gruyère and fold it into the dough after adding the wet ingredients. The cheese melts into the crumb, creating pockets of gooey goodness.
For extra richness, sprinkle ¼ cup grated Parmesan on top before baking. This cheesy version is a crowd-pleaser at outdoor gatherings.
Campfire Ash Method
For the most authentic experience, try baking your damper in campfire ashes. Shape the dough, wrap it in foil, and place it in a bed of hot ashes for 20-30 minutes. The uneven heat creates a crispy, charred crust with smoky undertones.
Just be sure to monitor it closely—ashes can get dangerously hot! This method is perfect for bush camping trips where an oven isn’t available. 🔥
Whole Grain Rustic
Replace ½ cup of the all-purpose flour with whole wheat flour or spelt flour for a nuttier, heartier damper. The texture will be denser but packed with fiber. Add 1 tsp cinnamon or pumpkin spice for warmth, and top with chopped walnuts or pecans before baking.
This version is ideal for a cozy fall breakfast or snack.
Dutch Oven Crisp
For a restaurant-quality crust, bake your damper in a preheated Dutch oven at 425°F for 25 minutes. The heavy cast iron traps steam, creating a thick, crackly crust while keeping the interior moist.
Brush the top with melted butter after baking for extra richness. This method is my go-to for special occasions or when I want to impress guests.
Nutrition facts
Frequently asked questions
Can I make damper bread without butter?
Yes! You can substitute butter with ½ cup melted coconut oil or olive oil for a dairy-free version. The texture will be slightly denser but still delicious. For extra richness, use a mix of ¼ cup butter and ¼ cup oil—this keeps the classic flavor while accommodating dietary needs.
Why did my damper turn out dense instead of light?
Dense damper usually happens from overmixing the dough or using stale baking powder. Whisk just until combined, and check your baking powder's freshness—it should bubble when mixed with water. Also, ensure your butter is cold (not melted) and the oven is fully preheated to 425°F.
How do I make damper on a campfire?
Shape the dough into a round loaf, wrap it tightly in foil, and place it in a bed of hot campfire ashes. Bake for 20-30 minutes, checking frequently—the uneven heat creates a crispy, charred crust. For extra safety, use a heat-resistant glove to handle the foil. This method delivers that authentic bushfire flavor!
Can I make damper ahead of time?
Damper actually tastes better the next day as the crust firms up. Store wrapped in a clean kitchen towel at room temperature for up to 3 days. For longer storage, freeze shaped portions for 3 months—just thaw at room temperature before serving. Reheat slices in a skillet for 2-3 minutes for extra crispiness.
What's the best way to serve damper?
Classic damper is best served warm with butter and jam or honey. For a savory twist, pair it with grilled meats or cheese. The crispy crust contrasts perfectly with the soft interior—slice thick (1-inch pieces) to showcase this texture. Aussie bushmen ate it plain, but modern versions love toppings!