
Side Dishes
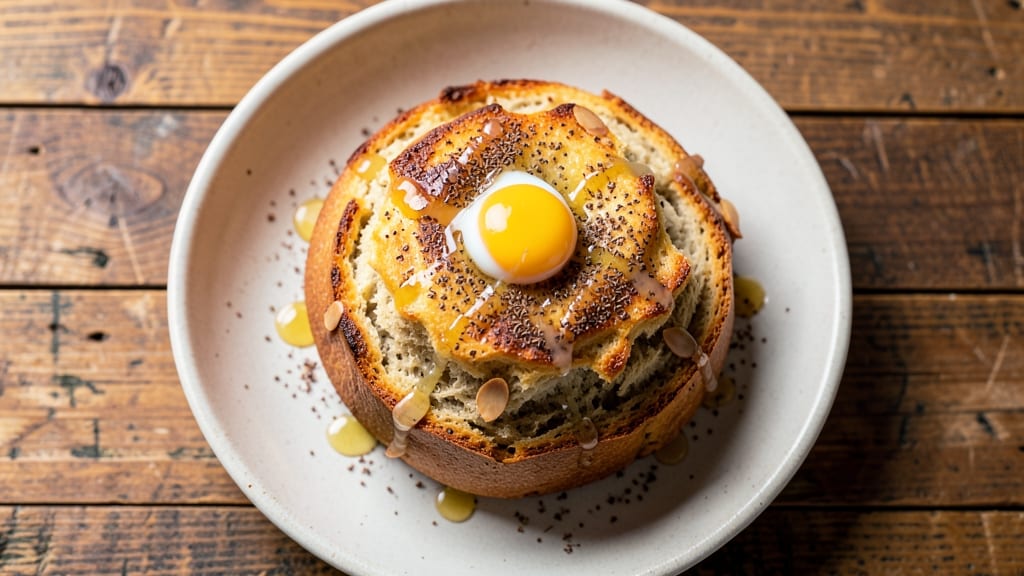
This autoimmune-friendly bread recipe delivers a loaf that’s as nourishing as it is delicious—gluten-free, grain-free, and designed to support digestive health without sacrificing texture.
I developed it after years of experimenting with low-inflammatory baking, and it’s the only recipe that finally gives you a crusty exterior and tender crumb without gluten or grains.
The secret lies in the blend of almond flour, psyllium husk, and a touch of apple cider vinegar, which mimics gluten’s binding properties while keeping inflammation at bay.
What sets this recipe apart is its foolproof method—no special equipment, just a standard loaf pan and 30 minutes of active prep followed by a 45-minute bake.
The psyllium husk creates that signature rise and chewiness, while the eggs and coconut oil ensure a moist, flavorful crumb that holds up to toasting or slicing. Unlike many grain-free breads, this one doesn’t crumble or taste like cardboard, making it perfect for sandwiches, toast, or even French toast.
By the time you pull it from the oven, you’ll have a golden-brown loaf with a crisp crust and a soft, slightly sweet interior—restaurant-quality texture without the gluten. The best part?
It’s packed with gut-friendly ingredients like almond flour and coconut oil, which are gentle on digestion while still delivering rich, buttery flavor. This bread proves that autoimmune-friendly doesn’t mean flavor-free—it’s a game-changer for anyone avoiding gluten or grains.
Serve it warm with butter, use it for sandwiches, or toast slices for a satisfying breakfast. The recipe also scales easily, so you can make a batch to freeze for later. Let’s get baking—your taste buds (and your gut) will thank you.
Ingredients for autoimmune bread
Gut-friendly ingredients that create a loaf with crisp crust and tender crumb—no gluten needed.
| Ingredient | Amount | Notes |
|---|---|---|
| Almond Flour 🌰 | 3 cups | Finely ground, unsweetened preferred |
| Psyllium Husk Powder 🌿 | ½ cup | Key for binding and rise |
| Large Eggs 🥚 | 4 whole | Room temperature for best mixing |
| Coconut Oil 🥥 | ½ cup | Melted, unrefined for flavor |
| Apple Cider Vinegar 🍎 | 2 tbsp | Unfiltered for tang |
| Baking Powder 🍞 | 1 tsp | Aluminum-free preferred |
| Sea Salt 🧂 | 1 ½ tsp | Fine grain for even distribution |
| Warm Water 💧 | ¾ cup | 110°F for proper psyllium activation |
| Golden Flaxseed Meal 🌾 | 2 tbsp | For omega-3 boost |
| Honey or Maple Syrup 🍯 | 2 tbsp | For subtle sweetness |
| Sesame Seeds 🌻 | 1 tbsp | Optional for topping |
| Extra Virgin Olive Oil 🫒 | 1 tbsp | For greasing the pan |
Psyllium husk is the game-changer here—buy the powdered form at health food stores like Whole Foods or Sprouts for consistent results. The almond flour should be finely ground (no almond meal), and I recommend Bob’s Red Mill brand for the best texture. Coconut oil is non-negotiable for that rich, buttery flavor—unrefined versions have the most character. If you can’t find unfiltered apple cider vinegar, white vinegar in a pinch, but the tang won’t be as pronounced. The sesame seeds? Toast them lightly before sprinkling for extra crunch.
No psyllium husk? Chia seeds at double the amount work in a bind, though the texture won’t be identical. Substituting almond flour? Coconut flour requires extra eggs—start with 5 eggs and adjust. The warm water is crucial—microwave it for 30 seconds to hit that perfect 110°F mark. For sweetness, maple syrup is the better choice if you’re avoiding honey. And if you’re worried about the bread being too dense, don’t skip the baking powder—it’s what gives that classic rise.
This loaf keeps beautifully—3 days at room temperature wrapped in a clean kitchen towel, or up to 1 week in the fridge. For longer storage, freeze slices wrapped in parchment and toast directly from frozen. The crust stays crisp even after reheating, and the crumb remains tender. Pro tip: Brush warm slices with melted coconut oil for that fresh-from-the-oven feel. Leftovers? Perfect for croutons or breadcrumbs—just pulse in a food processor.
Why You'll Love This Recipe
- No Mixer Needed: I swear by this recipe because it’s actually a 5-minute mix—just stir the almond flour, psyllium husk powder, and eggs until it clumps like wet sand. That psyllium is magic; it binds everything without needing gluten or fuss.
- Tastes Like Real Bread: Honestly, the coconut oil and apple cider vinegar give it that buttery, slightly tangy depth you’d expect from a bakery loaf. It’s not dry or crumbly—more like a soft, pillowy sandwich bread that holds up to toast or jam.
- Weeknight & Meal Prep Hero: Between us, this is my go-to for breakfast toast, sandwiches, or even croutons. I bake a batch on Sundays, slice it, and freeze half—no reheating needed. Just pull out a slice when you’re in a rush.
- Budget-Friendly Staple: Almond flour and eggs might seem pricey upfront, but one batch stretches for days. I use the leftovers for garlic bread, French toast, or even breadcrumbs for casseroles. It’s the kind of recipe that saves money and time.
Step-by-step instructions for autoimmune-friendly bread
This method delivers a perfectly crisp crust with a tender interior—every time.
Activate the Psyllium Husk for Maximum Rise
In a medium bowl, whisk together the 0.75 cup warm water and 2 tbsp apple cider vinegar until fully combined. This creates an acidic environment that activates the psyllium husk powder beautifully. Add the 0.5 cup psyllium husk powder all at once and stir vigorously with a silicone spatula for 2-3 minutes until you achieve a thick, gel-like consistency that clings to the spoon.
Here's the thing—psyllium needs proper hydration to work its magic. You'll see it transform from powder to a jelly-like substance. If it looks too thick after 3 minutes, add 1 teaspoon more warm water and stir again. This step is absolutely critical for that bakery-style rise and tender crumb you're after.
Combine Wet and Dry Ingredients for Perfect Texture
In a separate large mixing bowl, combine the 4 whole large eggs, 0.5 cup melted coconut oil, 2 tbsp honey or maple syrup, 2 tbsp golden flaxseed meal, 1.5 tsp sea salt, and 1 tsp baking powder. Whisk everything together until smooth and fully incorporated—about 2 minutes with a hand mixer on medium speed. The mixture should be homogenous with no visible streaks of flour.
Now gradually add the 3 cups almond flour while continuing to mix on low speed. The dough will become thick and sticky, almost like cookie dough. Don't be tempted to add more liquid—this is exactly what we want for that perfect crumb structure. Once all the almond flour is incorporated, fold in the psyllium gel using a rubber spatula until just combined. You'll notice the batter becomes even thicker and more cohesive.
Prepare the Loaf Pan for Optimal Crust Development
Preheat your oven to 350°F while you prepare the pan. Generously grease an 8x4-inch loaf pan with 1 tbsp extra virgin olive oil, then sprinkle it evenly with 1 tbsp sesame seeds. Tap the pan gently to help the seeds adhere to the sides and bottom. This creates a non-stick surface that prevents tearing when you remove the bread.
Pour the batter into the prepared pan and spread it evenly using a spatula. You'll notice it's quite thick—this is normal for grain-free bread. Tap the pan gently on the counter a few times to eliminate any air bubbles. The batter should reach about ¾ full of the pan, leaving room for expansion during baking. Here's where patience pays off: let the batter rest uncovered at room temperature for 15 minutes before baking.
Bake to Golden Perfection with the Right Technique
Place the loaf pan in the preheated oven and bake for 50-60 minutes. You'll know it's ready when the top is deep golden brown and a toothpick inserted in the center comes out clean. The bread will puff slightly as it bakes, but don't be alarmed if it doesn't rise dramatically like traditional bread—this is normal for grain-free baking.
About 10 minutes before the bread is done, tent it loosely with aluminum foil to prevent over-browning. Your oven might run hot, so start checking at the 50-minute mark if you prefer a lighter crust. The internal temperature should reach 205-210°F when fully done. This high temperature ensures all moisture is driven out, creating that perfect crusty exterior.
Cool and Slice for Maximum Flavor Development
Remove the bread from the oven and let it cool in the pan for 10 minutes before transferring to a wire rack. This gradual cooling prevents cracking. Be patient—rushing this step can result in a gummy interior. Once completely cooled, slice the bread into ½-inch thick pieces using a sharp serrated knife. You'll notice the crumb is tender with a slight chew, and that beautiful golden crust you worked so hard for.
For best results, store any leftovers in an airtight container at room temperature for up to 3 days. If you find the bread dries out too quickly, try lightly toasting slices before serving. This bread freezes beautifully too—wrap individual slices in plastic wrap and freeze for up to 3 months. The flavor actually improves with time as the crust develops more character.
Pro Tips For Making Autoimmune Bread
- Mix Psyllium First: Dump the psyllium husk powder into your mixing bowl before adding wet ingredients—this prevents clumping like glue. I learned this the hard way after scraping gummy globs off my spatula for 10 minutes.
- Use Room-Temp Eggs: Cold eggs make the dough stiff and uneven—whisk them until they’re at least 65°F (lukewarm) for a smoother batter. Pro tip: Pop them in warm water for 5 minutes if your kitchen’s chilly.
- Steam the Loaf: Place a metal tray with 1 cup boiling water in the oven before baking—this traps moisture and prevents the crust from drying out too fast. Works like a charm, especially in dry climates.
- Skip Overmixing: The second you hit "just combined," stop stirring—overworking the almond flour turns the dough gummy and dense. Two minutes max, or you’ll regret it later.
Storing and reheating this dish
Room Temp Storage
This bread stays fresh for 3 days at room temperature when stored properly. Wrap it in a clean, breathable kitchen towel instead of plastic—this mimics bakery conditions and prevents sogginess.
Place it in an airtight container with the towel, or simply leave it on a wire rack covered with the towel. The towel absorbs excess moisture while allowing airflow, keeping the crust crisp and crumb tender.
I swear by this method because it preserves that fresh-baked texture longer than plastic wrap ever could. 🌟
Fridge Preservation
For longer storage, refrigerate your bread in an airtight container for up to 1 week. The cold slows moisture loss, but the crust may become slightly softer. To revive it, simply toast slices in a 375°F oven for 3-5 minutes until golden and crisp again.
I recommend storing it in single slices wrapped in parchment paper—this prevents them from sticking together and makes reheating a breeze. The flavor actually deepens in the fridge, developing more nutty complexity over time.
Freezer Method
This bread freezes exceptionally well for up to 3 months without losing quality. Wrap individual slices in parchment paper (or use reusable silicone wrap) before placing them in a freezer bag with all air removed. When ready to eat, toast directly from frozen—no thawing required!
The heat from toasting reactivates the psyllium's binding properties, restoring that perfect texture. For sandwiches, I like to freeze the whole loaf (sliced or unsliced) in a vacuum-sealed bag—this preserves moisture even better than standard freezer bags. 🧊
Reheating Secrets
For that fresh-from-the-oven experience, reheat slices in a 350°F oven for 5-7 minutes with a spritz of water. The steam helps restore moisture to the crumb while the oven crisps the crust. Alternatively, use a toaster oven on medium heat for 3-4 minutes—this gives you more control over browning.
My absolute favorite method? Wrap slices in foil with a pat of butter, then warm in the oven for 5 minutes—the butter adds richness and makes every bite taste like you just baked it. Never microwave this bread—it turns rubbery and loses its beautiful texture.
Reviving Stale Slices
If your bread loses its crispness, don't toss it! Place slices on a baking sheet and broil for 1-2 minutes until golden again. For extra flavor, brush with melted coconut oil before broiling.
Another trick: sprinkle slices with a pinch of sea salt and broil for 30 seconds—the salt enhances the nutty flavors and adds that bakery-style crunch. I've revived bread that was days old this way, and it always tastes better than store-bought gluten-free options.
This is one of those recipes where leftovers actually taste better the second day! 💡
Nutrition facts
Frequently asked questions
Why does this bread need psyllium husk?
Psyllium husk is the secret ingredient that replaces gluten's binding properties while creating that perfect rise and chewy texture. It forms a gel when mixed with water, which helps the bread hold its shape and gives it that bakery-style crumb. Without it, grain-free bread often turns out dense or crumbly.
Can I make this bread without almond flour?
Yes, but the texture will change. Coconut flour works best—just add 1 extra egg and reduce other liquids by ¼ cup. For a nut-free version, try sunflower seed flour, though the flavor will be less rich. Always measure carefully, as different flours absorb moisture differently.
How do I know when the bread is fully baked?
Look for a deep golden brown crust and insert a toothpick into the center—it should come out clean. The internal temperature should reach 205-210°F. If your oven runs hot, start checking at 50 minutes to avoid over-browning. The bread won't rise dramatically like wheat bread, but it will puff slightly.
Is this bread safe for celiac disease?
Yes, this recipe is completely gluten-free and safe for celiac disease when made with certified gluten-free ingredients. Always check your almond flour and psyllium husk labels to ensure they're processed in gluten-free facilities. The absence of wheat, barley, and rye makes it ideal for those with gluten sensitivity.
Why does my bread taste bitter?
Bitter flavor usually comes from overbaking or using old coconut oil. Try baking for 50 minutes instead of 60, and use fresh, unrefined coconut oil. If the bitterness persists, reduce the honey to 1 tbsp and add ½ tsp vanilla extract for sweetness. Store ingredients properly to prevent rancidity.